Achieve Soft, Fluffy Classic Cinnamon Buns with Melted Cream Cheese Icing
Few aromas evoke a sense of home and comfort quite like the sweet, spicy fragrance of freshly baked cinnamon buns. These beloved morning pastries are more than just a treat; they're an experience – a warm, inviting hug on a plate, especially when they boast that irresistible combination of soft, pillowy dough, a gooey cinnamon swirl, and a decadent, melted cream cheese icing. Forget the bakery line; making classic cinnamon buns from scratch is a surprisingly rewarding journey that culminates in a truly show-stopping breakfast or dessert.
Imagine biting into a swirl where tender dough meets a rich brown sugar and cinnamon filling, all lovingly coated in a sweet, tangy icing that gently melts into every warm crevice. This isn't just baking; it's crafting edible joy that’s perfect for holiday brunches, cozy weekend mornings, or any occasion that calls for something truly special and homemade. Let's unlock the secrets to achieving these perfect, ooey-gooey delights.
The Foundation: Achieving That Irresistibly Soft and Pillowy Dough
The heart of any exceptional cinnamon bun lies in its dough. It needs to be incredibly soft, light, and tender, capable of rising into those pillowy spirals we all crave. This isn't achieved by accident; it's the result of carefully managed ingredients and techniques.
Yeast Activation and Temperature Control
The journey begins with activating your yeast. Combining warm milk (or water and milk) at a temperature between 100°F and 110°F with a pinch of sugar creates the ideal environment for yeast to bloom. This ensures your yeast is alive and ready to work its magic, transforming your dough into a light, airy masterpiece. Too cold, and the yeast won't activate; too hot, and you risk killing it. A foamy mixture after about 5 minutes is your green light.
The Art of Kneading
Once your yeast is active, you'll combine it with melted butter, an egg yolk (for richness and color), vanilla extract, flour, and a touch of salt. While all-purpose flour works, many bakers find bread flour yields a slightly chewier yet still tender crumb, thanks to its higher protein content. Kneading is crucial; it develops the gluten, giving the dough its structure and elasticity. Whether by hand or with a stand mixer, knead until the dough is smooth, elastic, and passes the "windowpane test" – where a small piece of dough can be stretched thin enough to see light through without tearing.
The First Rise: Patience is Key
After kneading, the dough needs its first rise. Place it in a lightly oiled bowl, cover loosely with plastic wrap, and let it rest in a warm, draft-free place until it has doubled in size. This usually takes about 1 hour and 10 minutes, but can vary depending on your ambient temperature. A warm oven (turned off, with just the light on) or a sunny spot on your counter are excellent choices. This initial rise is vital for developing flavor and achieving that signature soft texture. For more in-depth tips on perfecting your dough, you might find valuable insights in
The Secret to Soft, Gooey Classic Cinnamon Buns Recipe.
Crafting the Perfect Cinnamon Swirl: From Filling to Roll
Once your dough has completed its first rise, it’s time to transform it into the iconic cinnamon bun shape, complete with its sweet, spiced interior.
Rolling and Spreading
Turn your risen dough out onto a lightly floured surface. Gently deflate it and roll it into a substantial rectangle, approximately 10 by 18 inches. The precise dimensions help ensure you get a good number of rolls with even spirals. Next, generously spread softened (not melted) butter evenly over the entire surface of the dough, leaving a 1-inch border along one of the long sides. This border is essential for sealing.
The Irresistible Cinnamon-Sugar Filling
In a separate bowl, whisk together brown sugar and ground cinnamon. Some recipes also include a touch of nutmeg or even a pinch of salt to enhance the flavors. Sprinkle this mixture evenly over the buttered dough, making sure it extends right up to the buttered edges. The butter helps the sugar adhere, preventing it from spilling out during rolling.
Rolling and Cutting: The Signature Spiral
Starting from the long side opposite the unbuttered border, tightly roll the dough into an 18-inch log. The tighter you roll, the more distinct and beautiful your spirals will be, and the less likely the filling is to escape. Once rolled, pinch the seam firmly to seal the log.
Now for cutting! While a sharp knife works, the classic method involves using a piece of unflavored dental floss or strong thread. Slip it under the log, cross the ends over the top, and pull tightly to create a clean cut. Repeat this process every 1 1/2 inches to yield about 12 perfectly shaped rolls. Arrange these rolls in a buttered 9x13-inch baking dish, leaving a little space between them as they will expand during their second rise.
The Second Rise: Building Anticipation
Loosely cover your baking dish with plastic wrap and let the rolls rise again in a warm spot until they have doubled in size, usually about 1 hour and 10 minutes. This second proofing is crucial for achieving that incredibly fluffy, light texture after baking.
Baking to Golden Perfection and the Magic of Melted Cream Cheese Icing
With your rolls perfectly proofed, the moment of truth in the oven awaits, followed by the grand finale: a luscious, melted cream cheese icing.
Baking for a Golden Hue
Preheat your oven to 350°F (175°C). Once preheated, uncover your rolls and bake for 25 to 30 minutes, or until they are golden brown on top and spring back lightly when gently pressed. Be careful not to overbake, as this can lead to dry buns. The key is to bake them just until done, ensuring they retain their internal moisture and tenderness.
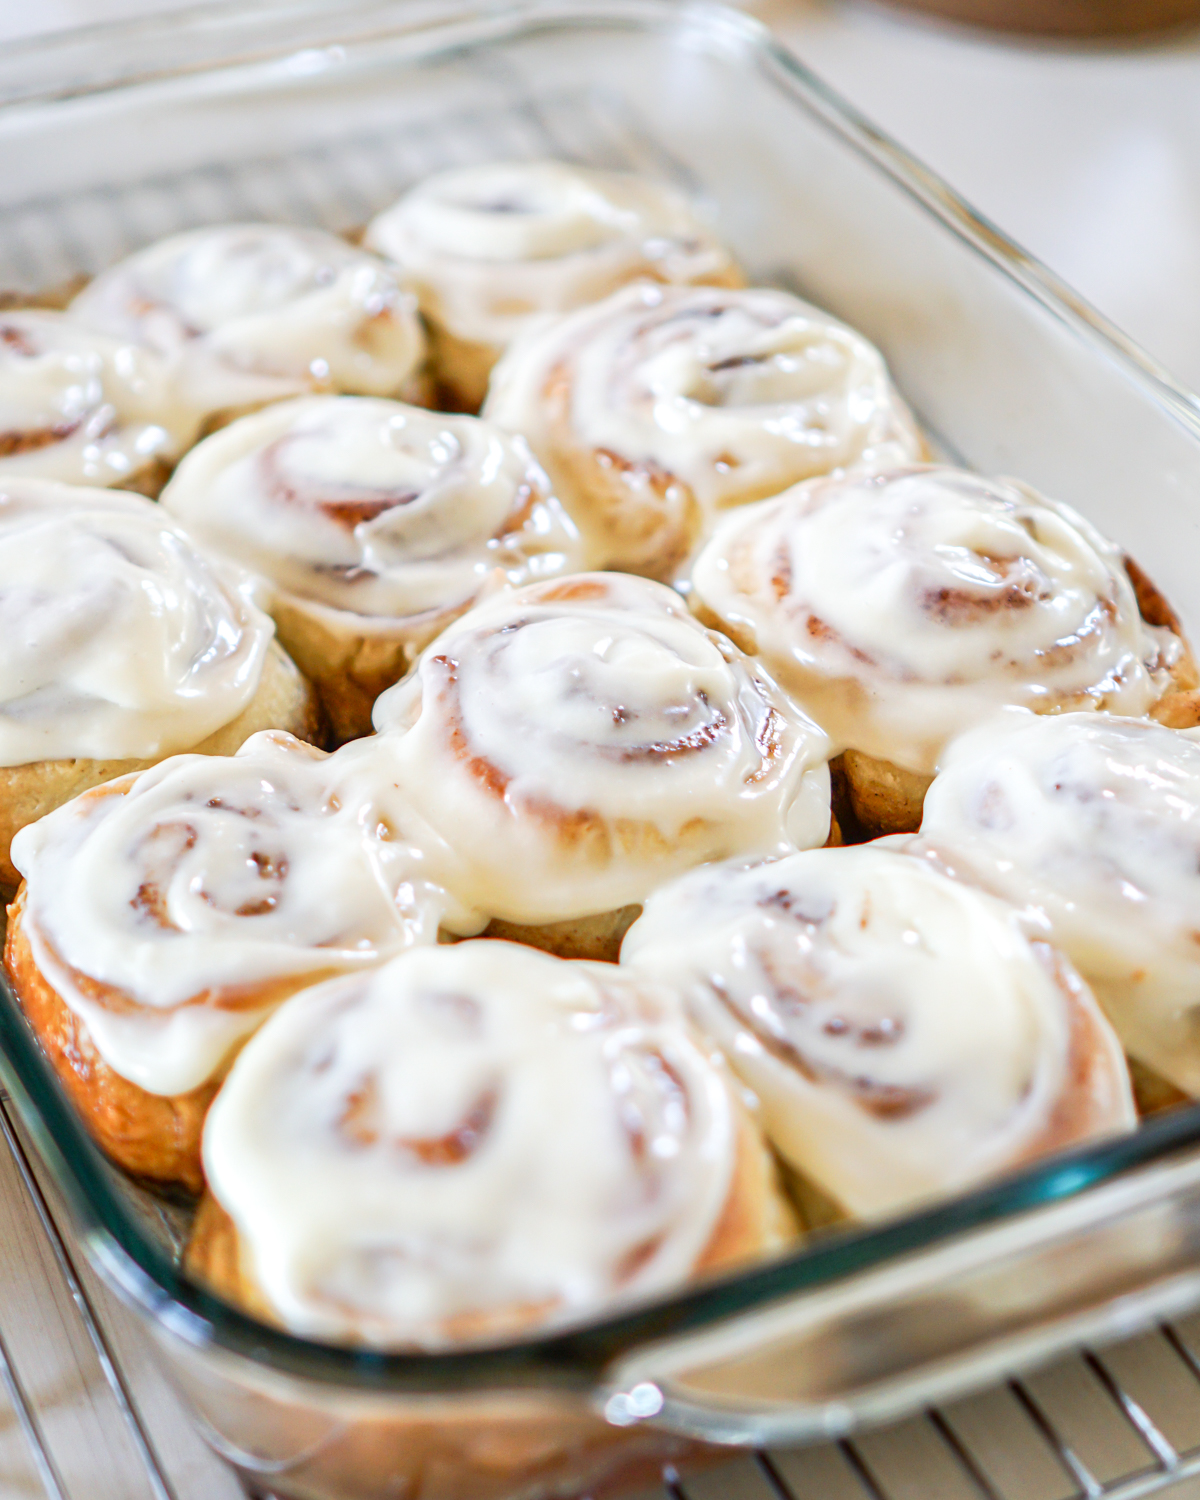
The Star: Melted Cream Cheese Icing
While the buns are cooling slightly in the pan for about 10 minutes, prepare your heavenly cream cheese icing. In a bowl, whisk together softened cream cheese, melted butter, confectioners' sugar, a splash of milk (or heavy cream for extra richness), a good quality vanilla extract, and a tiny pinch of salt to balance the sweetness. Whisk until the mixture is completely smooth and creamy. The magic of "melted" icing happens when you drizzle this glorious concoction over the warm buns. The residual heat from the rolls will slightly warm and soften the icing, allowing it to melt beautifully into every nook and cranny, creating an irresistible, glossy finish that makes every bite truly decadent and ooey-gooey.
Tips for Classic Cinnamon Bun Success and Making Ahead
Mastering classic cinnamon buns isn't just about following a recipe; it's about understanding the nuances that elevate a good bun to a great one.
Troubleshooting Common Issues
*
Dough Not Rising: The most common culprits are inactive yeast (check the expiry date!) or water that's too hot or cold during activation. Ensure your yeast foams up before proceeding.
*
Dry Buns: Overbaking is the main cause. Keep an eye on the clock and trust the "spring back" test. Also, too much flour during kneading can make the dough tough and dry.
*
Filling Spills Out: This usually means the dough wasn't rolled tightly enough, or the seam wasn't pinched securely.
Making Ahead for Convenience
One of the best things about homemade cinnamon buns is their versatility for make-ahead convenience.
*
Overnight Rise: After arranging the cut rolls in the baking dish, cover them tightly with plastic wrap and refrigerate overnight (up to 12-18 hours). In the morning, let them sit at room temperature for 30-60 minutes while your oven preheats, then bake as usual. This is perfect for leisurely weekend mornings or special occasions like Christmas. For more ideas on how to seamlessly integrate these into your routine, check out
Homemade Classic Cinnamon Rolls: Perfect for Any Occasion.
*
Freezing Baked Rolls: Once baked and completely cooled (before icing), you can freeze the rolls for up to 2 weeks. Thaw them at room temperature, then warm them in a low oven (around 250°F/120°C) until heated through, and then drizzle with fresh icing.
*
Freezing Unbaked Rolls: You can also freeze the cut, unbaked rolls. Arrange them on a baking sheet and freeze until solid, then transfer to a freezer-safe bag. When ready to bake, place them in a greased baking dish, cover, and let them thaw and rise in the refrigerator overnight, then bring to room temperature before baking.
Serving Suggestions
These soft, fluffy classic cinnamon buns are best served warm, ideally with a fresh cup of coffee or a glass of milk. The warm rolls allow the cream cheese icing to remain beautifully soft and melted, enhancing the overall experience. While they are a breakfast favorite, they also make an incredible dessert or afternoon treat.
There’s an undeniable charm to a homemade batch of classic cinnamon buns. The process, from activating the yeast to the final drizzle of melted cream cheese icing, is a labor of love that rewards you with incredible flavor and a sense of accomplishment. These soft, fluffy, and irresistibly gooey rolls are truly timeless, bringing comfort and joy to anyone who gets to savor them. So, gather your ingredients, clear your schedule, and embark on this delightful baking adventure. Your taste buds (and loved ones) will thank you!